[Server] 개발 환경 Setting :: Apache Tomcat, Eclipse
by 캐떠린1. 톰캣 설치
: HTML 첫 수업 때 개발 환경 Setting 하며 아파치 톰캣 설치해놓은 상태라 이번에는 해당 과정 생략!
(자세한 설명은 HTML 개발 환경 Setting 참고)
2. Eclipse 실행
2-1. New Workspace 지정
경로: C:\class\code\server
Eclipse → Workspace → 위 경로 지정하여 New Workspace에서 작업 시작!
2-2. Preferences 설정 및 Servers 생성
- 기존
*.epf파일import - UTF-8 인코딩 설정
- encoding → Workspace → Text file encoding → UTF-8
- encoding → Workspace → [Web] CSS Files → UTF-8
- encoding → Workspace → HTML Files → UTF-8
- encoding → Workspace → JSP Files → UTF-8
- encoding → Content Types → Text → Default encoding → UTF-8 직접 입력 → Update
- Server(Runtime Environment) → Apache Tomcat 9.0 → 이클립스 등록
- Servers 연결(No servers are available. Click this link to create a new server…)

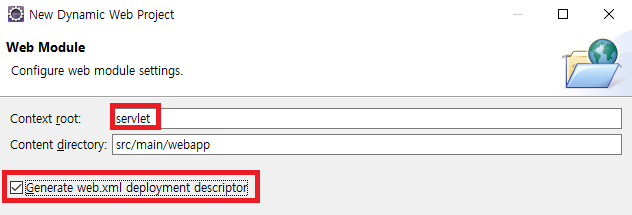
2-3. New Dynamic Web Project 생성
: New → Dynamic Web Project → ‘ServletTest’ 프로젝트 생성하기
- Context root: servlet으로 변경(쌤 스타일로 소문자로 변경!)
- Generate web.xml deployment descriptor 체크! ⇒
web.xml파일 생성
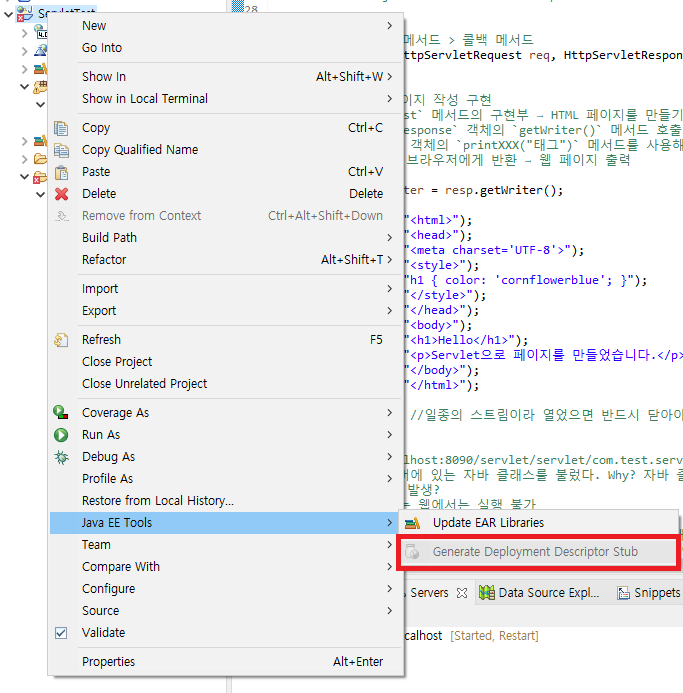
❓ 만약
Generate web.xml deployment descriptor을 체크하지 않았다면?Solution: 프로젝트 root 우클릭 - Java EE Tools - Generate Deployment Descriptor Stub 선택
위 사진에서는 web.xml 파일이 기 존재하기 때문에 활성화되지 않았다.
2-4. 작업 폴더 확인
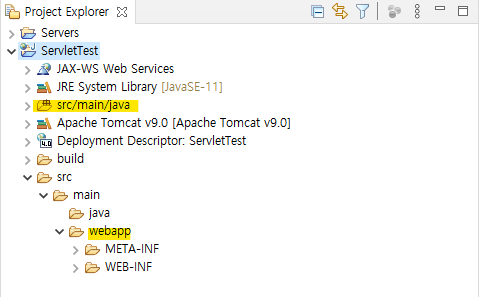
src/main/java: Server 작업 → 자바 파일이 위치할 폴더webapp: 기존 HTML, CSS, JavaScript 수업때와 같이 Client 작업 파일이 위치할 폴더
'Server' 카테고리의 다른 글
| [Server] JSP에 대하여 (2) | 2023.10.30 |
|---|---|
| [Server] 데이터 입력 및 데이터 수신 과정 톺아보기 (0) | 2023.10.29 |
| [Server] 정적 페이지 vs 동적 페이지 (2) | 2023.10.22 |
| [Server] Servlet 관련 각종 Error Case (0) | 2023.10.22 |
| [Server] Servlet(서블릿) (0) | 2023.10.22 |
블로그의 정보
All of My Records
캐떠린