[JavaScript Library] Toastr 라이브러리로 alert() 대체하기 :: 예쁜 알람 메세지
by 캐떠린alert();는 너무 투박해!
학원에서 Servlet/JSP 프로젝트를 진행하며 각종 알람 메세지에 alter();를 사용했었습니다.
근데 alert창은 예쁘지도 않고 투박하고, 또 요즘 웹사이트에서는 alter창보다는 화면의 상/하단에서 알림창이 예쁘게 올라왔다 사라지곤하며 알려주곤하죠!
게다가 alert창은 엔터를 꼭 눌러줘야한다는 번거로운점까지 있습니다.
Spring 프로젝트에서도 알람메세지나 필수 항목 입력 유효성검사에 대한 응답으로 alert창을 사용하였으나, 추후 개선사항을 반영하는 과정에서 alert를 대체할 예쁜 알람메세지 toastr 라이브러리를 알게되어 포스팅하고자합니다.
저는 toastr 라이브러리를 알게된 이후 현재 작업하는 토이프로젝트(은행 웹사이트 제작)의 알림창도 해당 라이브러리를 사용하고있어요.
정말 좋은 라이브러리가 많아서 손수 다 떠먹여주네요
Toastr란?
먼저 제가 어떻게 사용했는지 한번 보시죠.
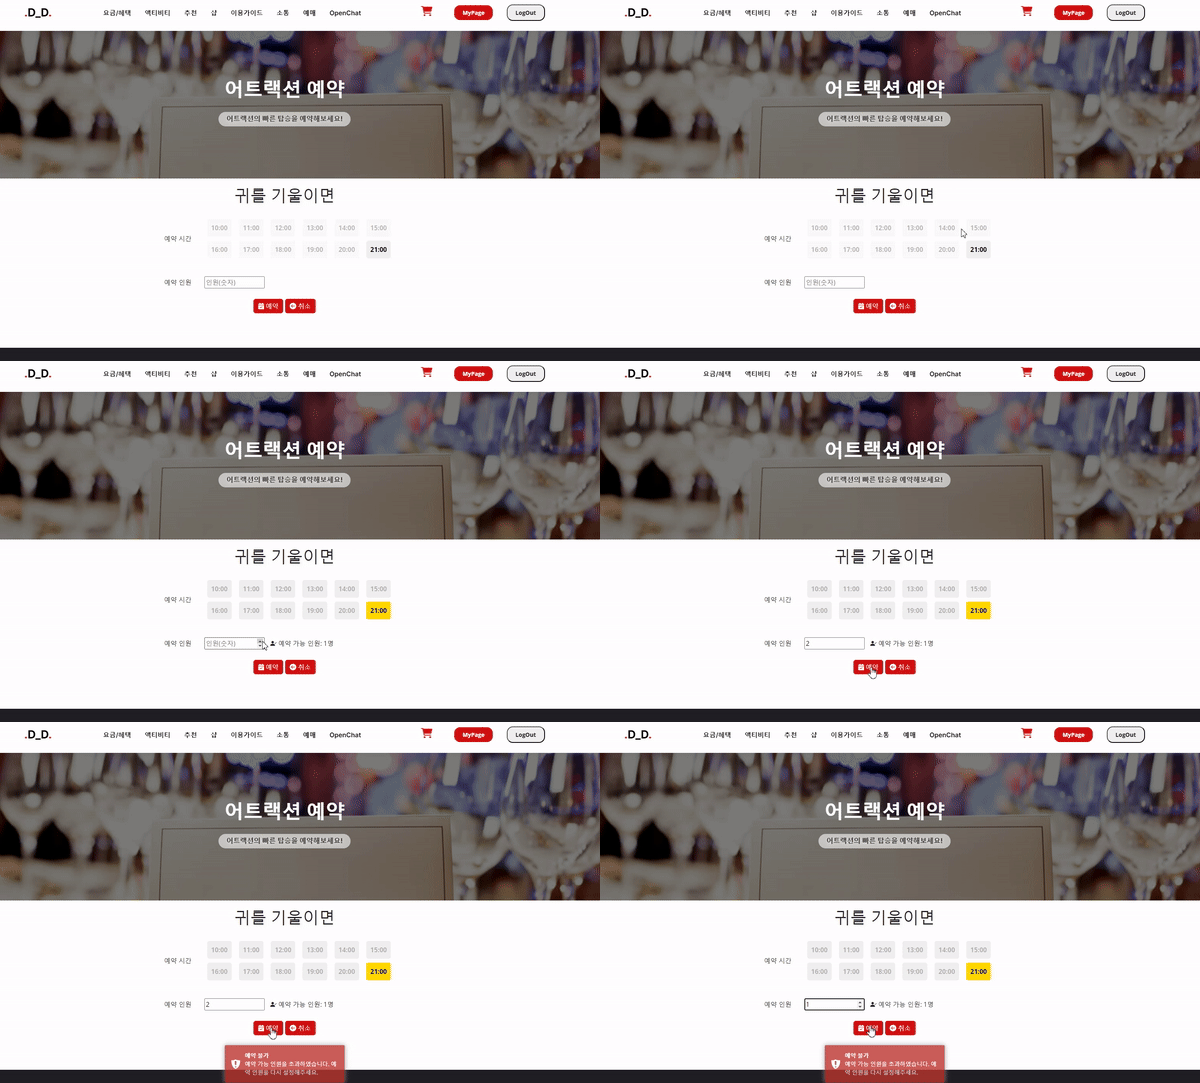
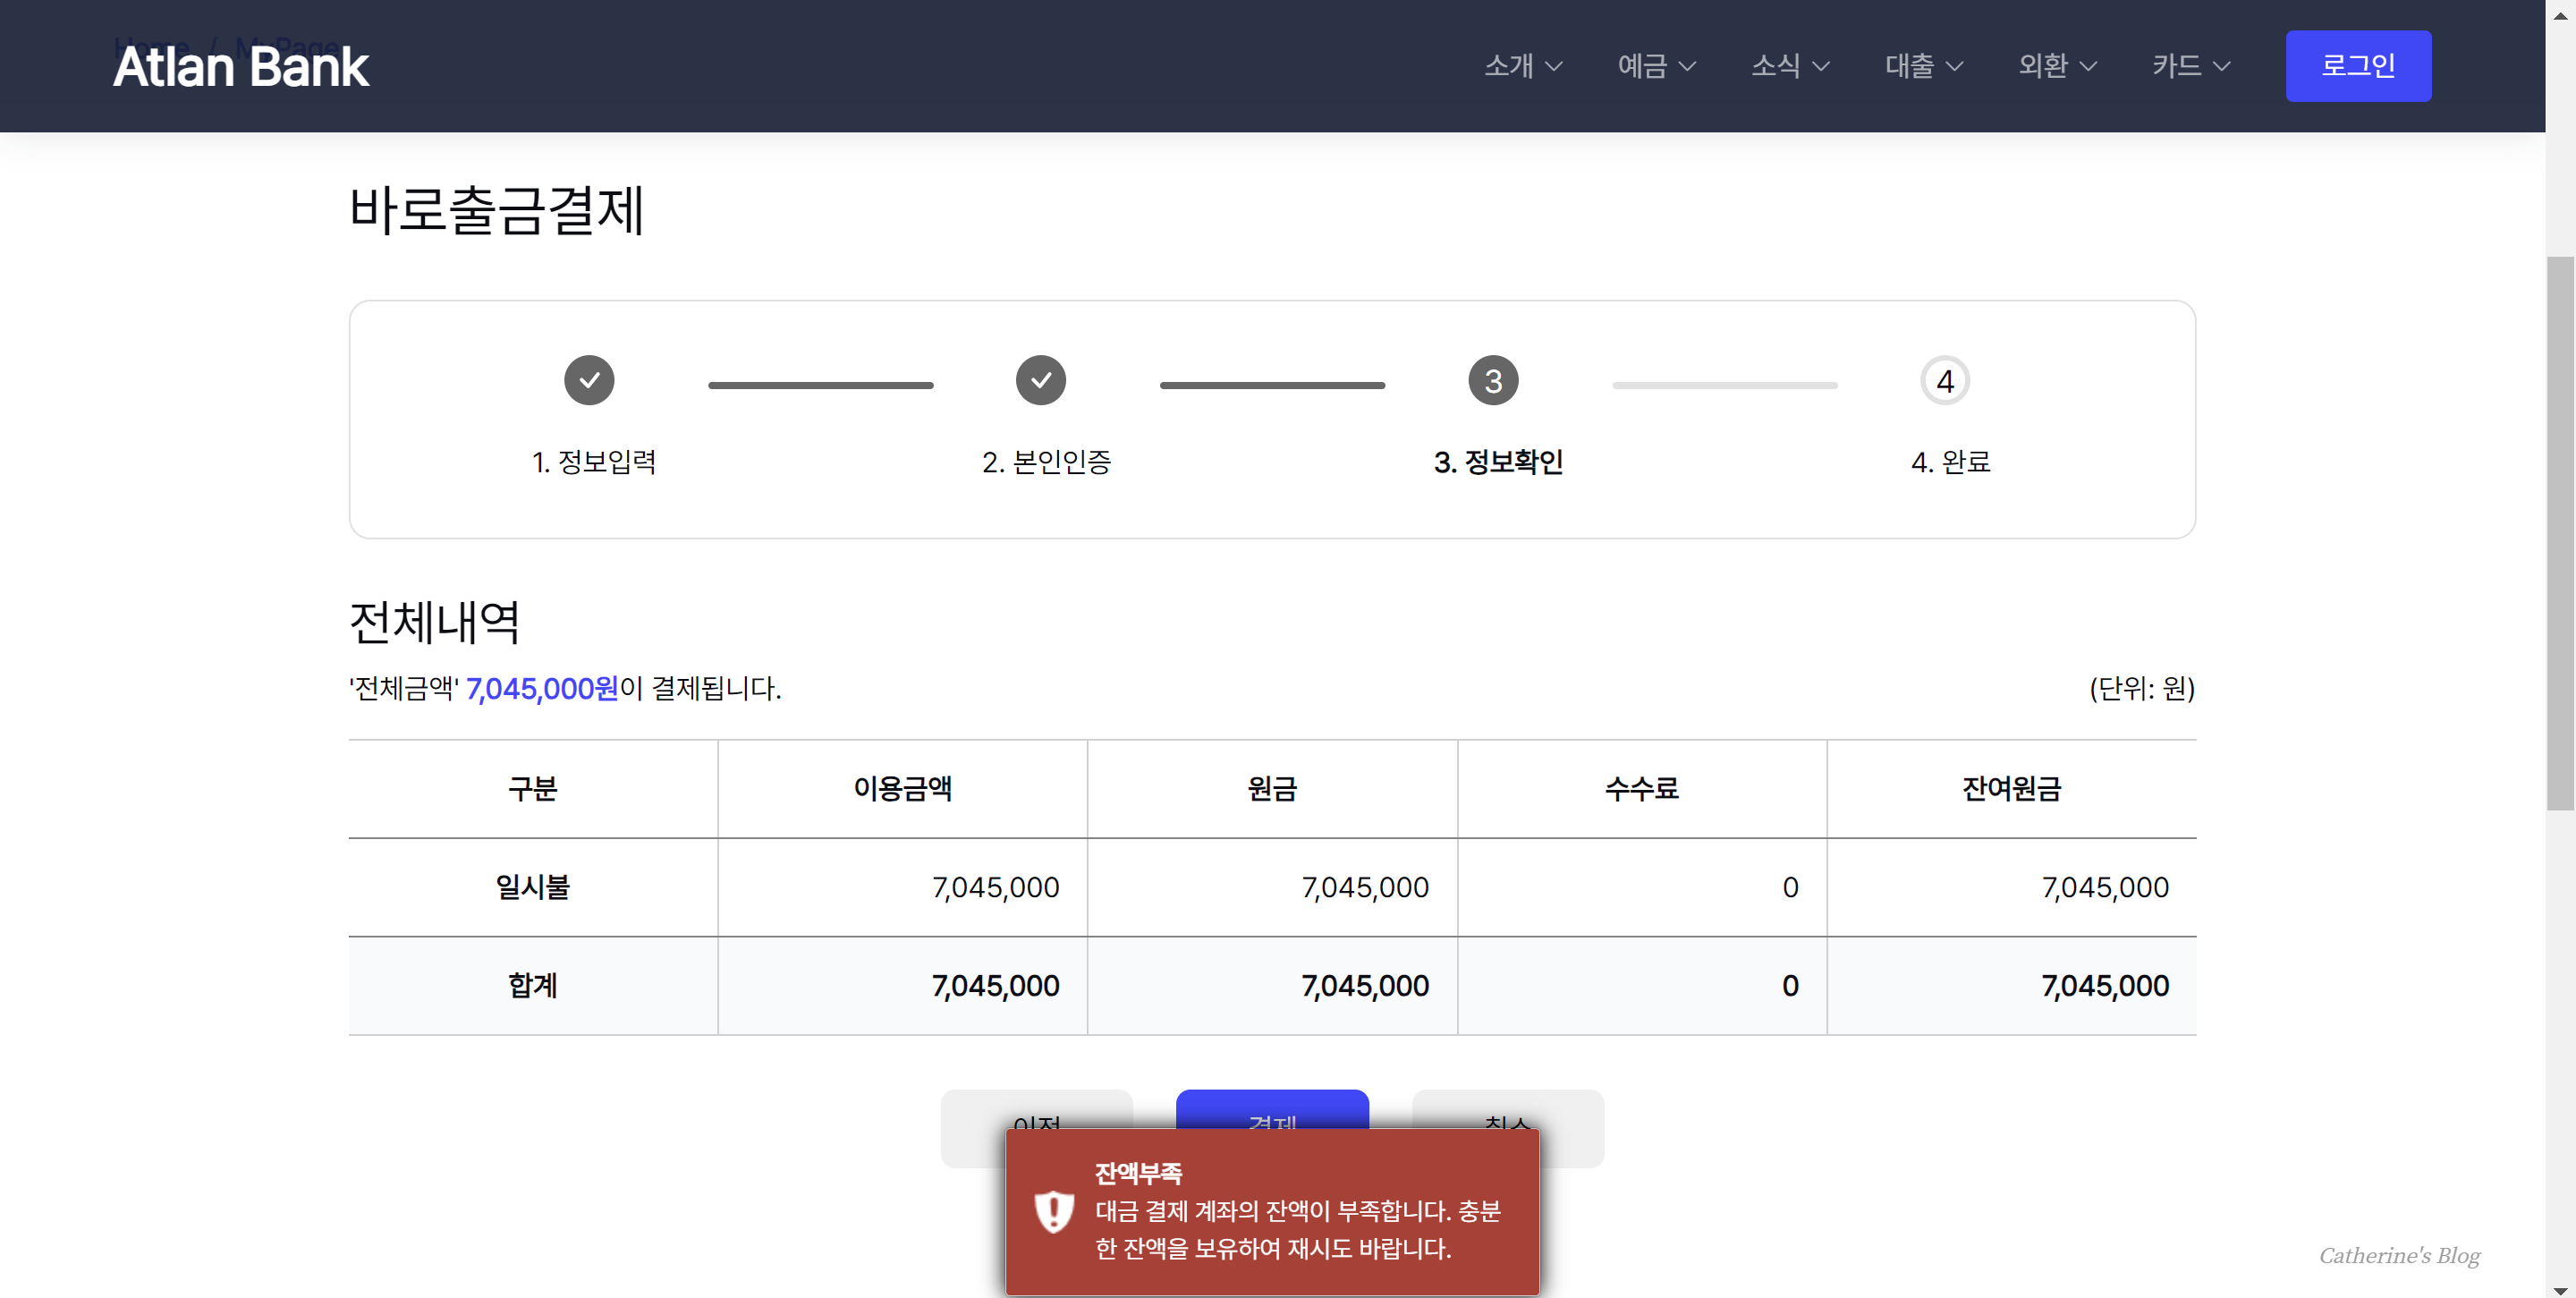
위와 같이 놀이공원 웹사이트에서 실시간 예약가능인원을 초과하여 예약한 경우 예약이 불가하다는 알림창을 toastr를 사용했습니다.
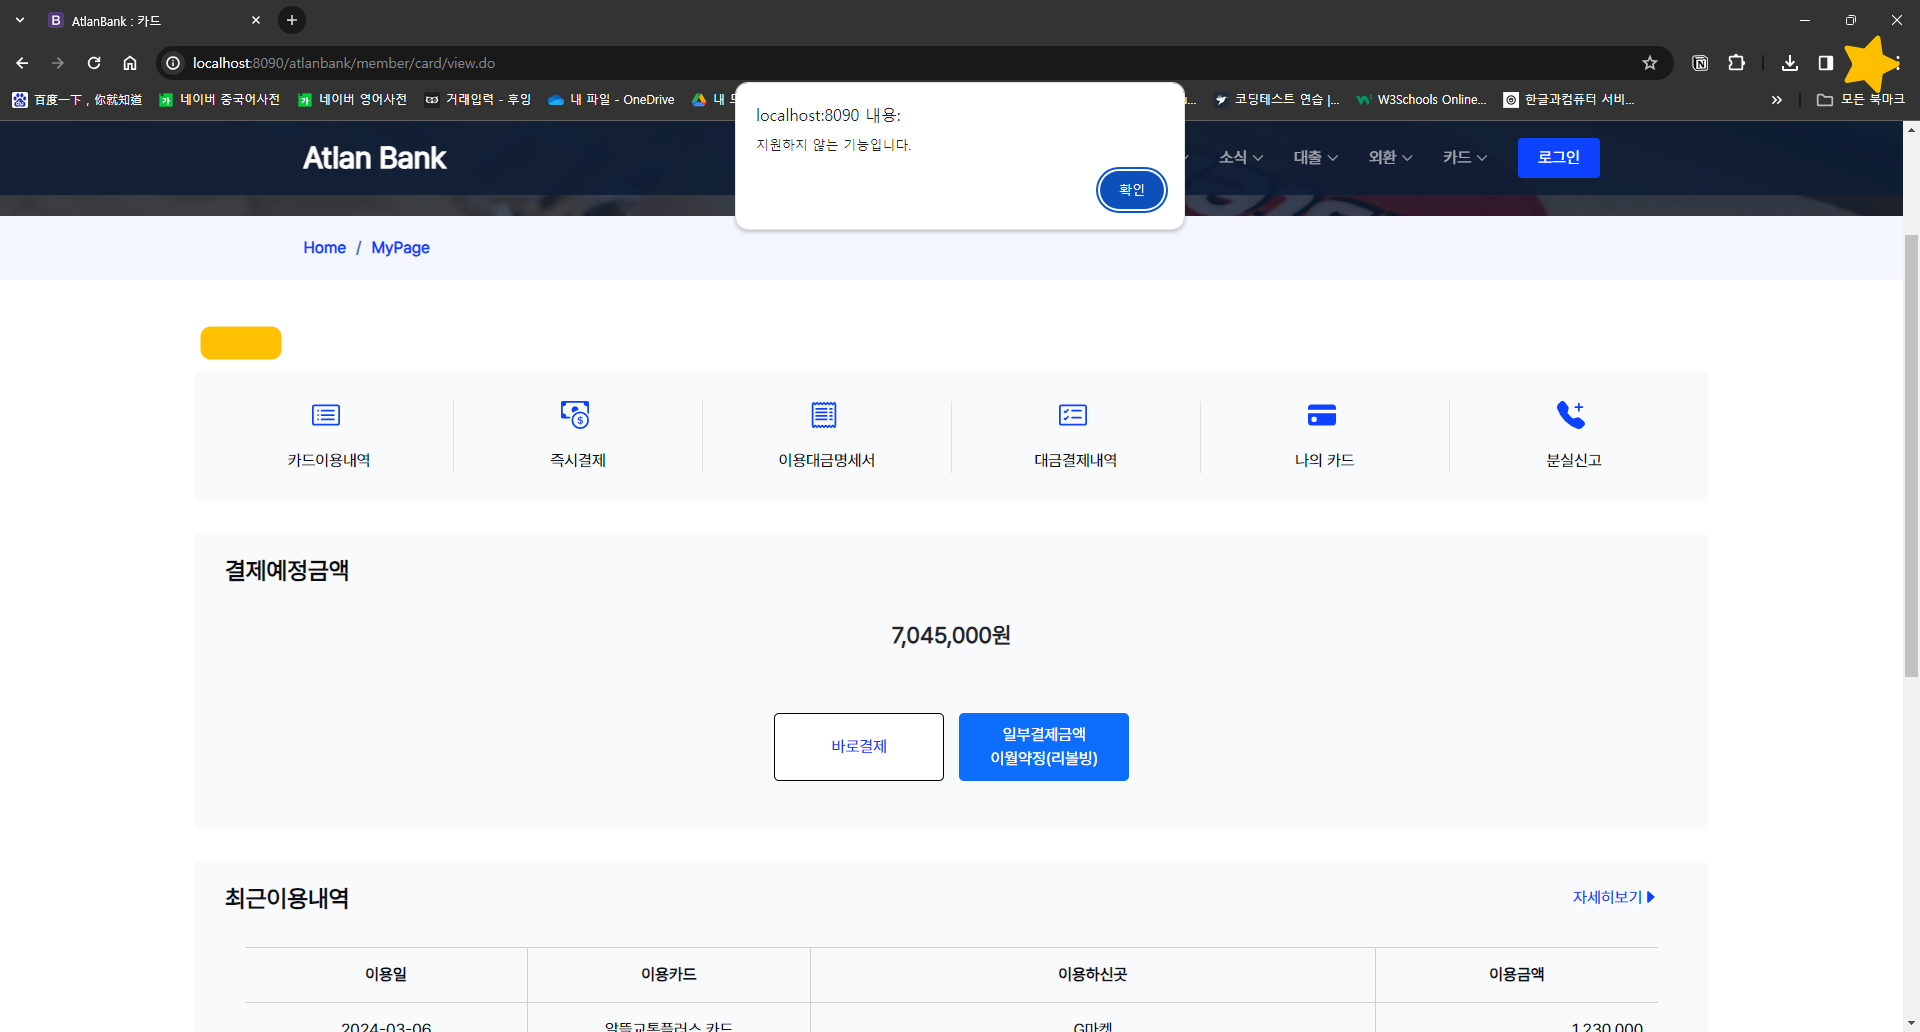
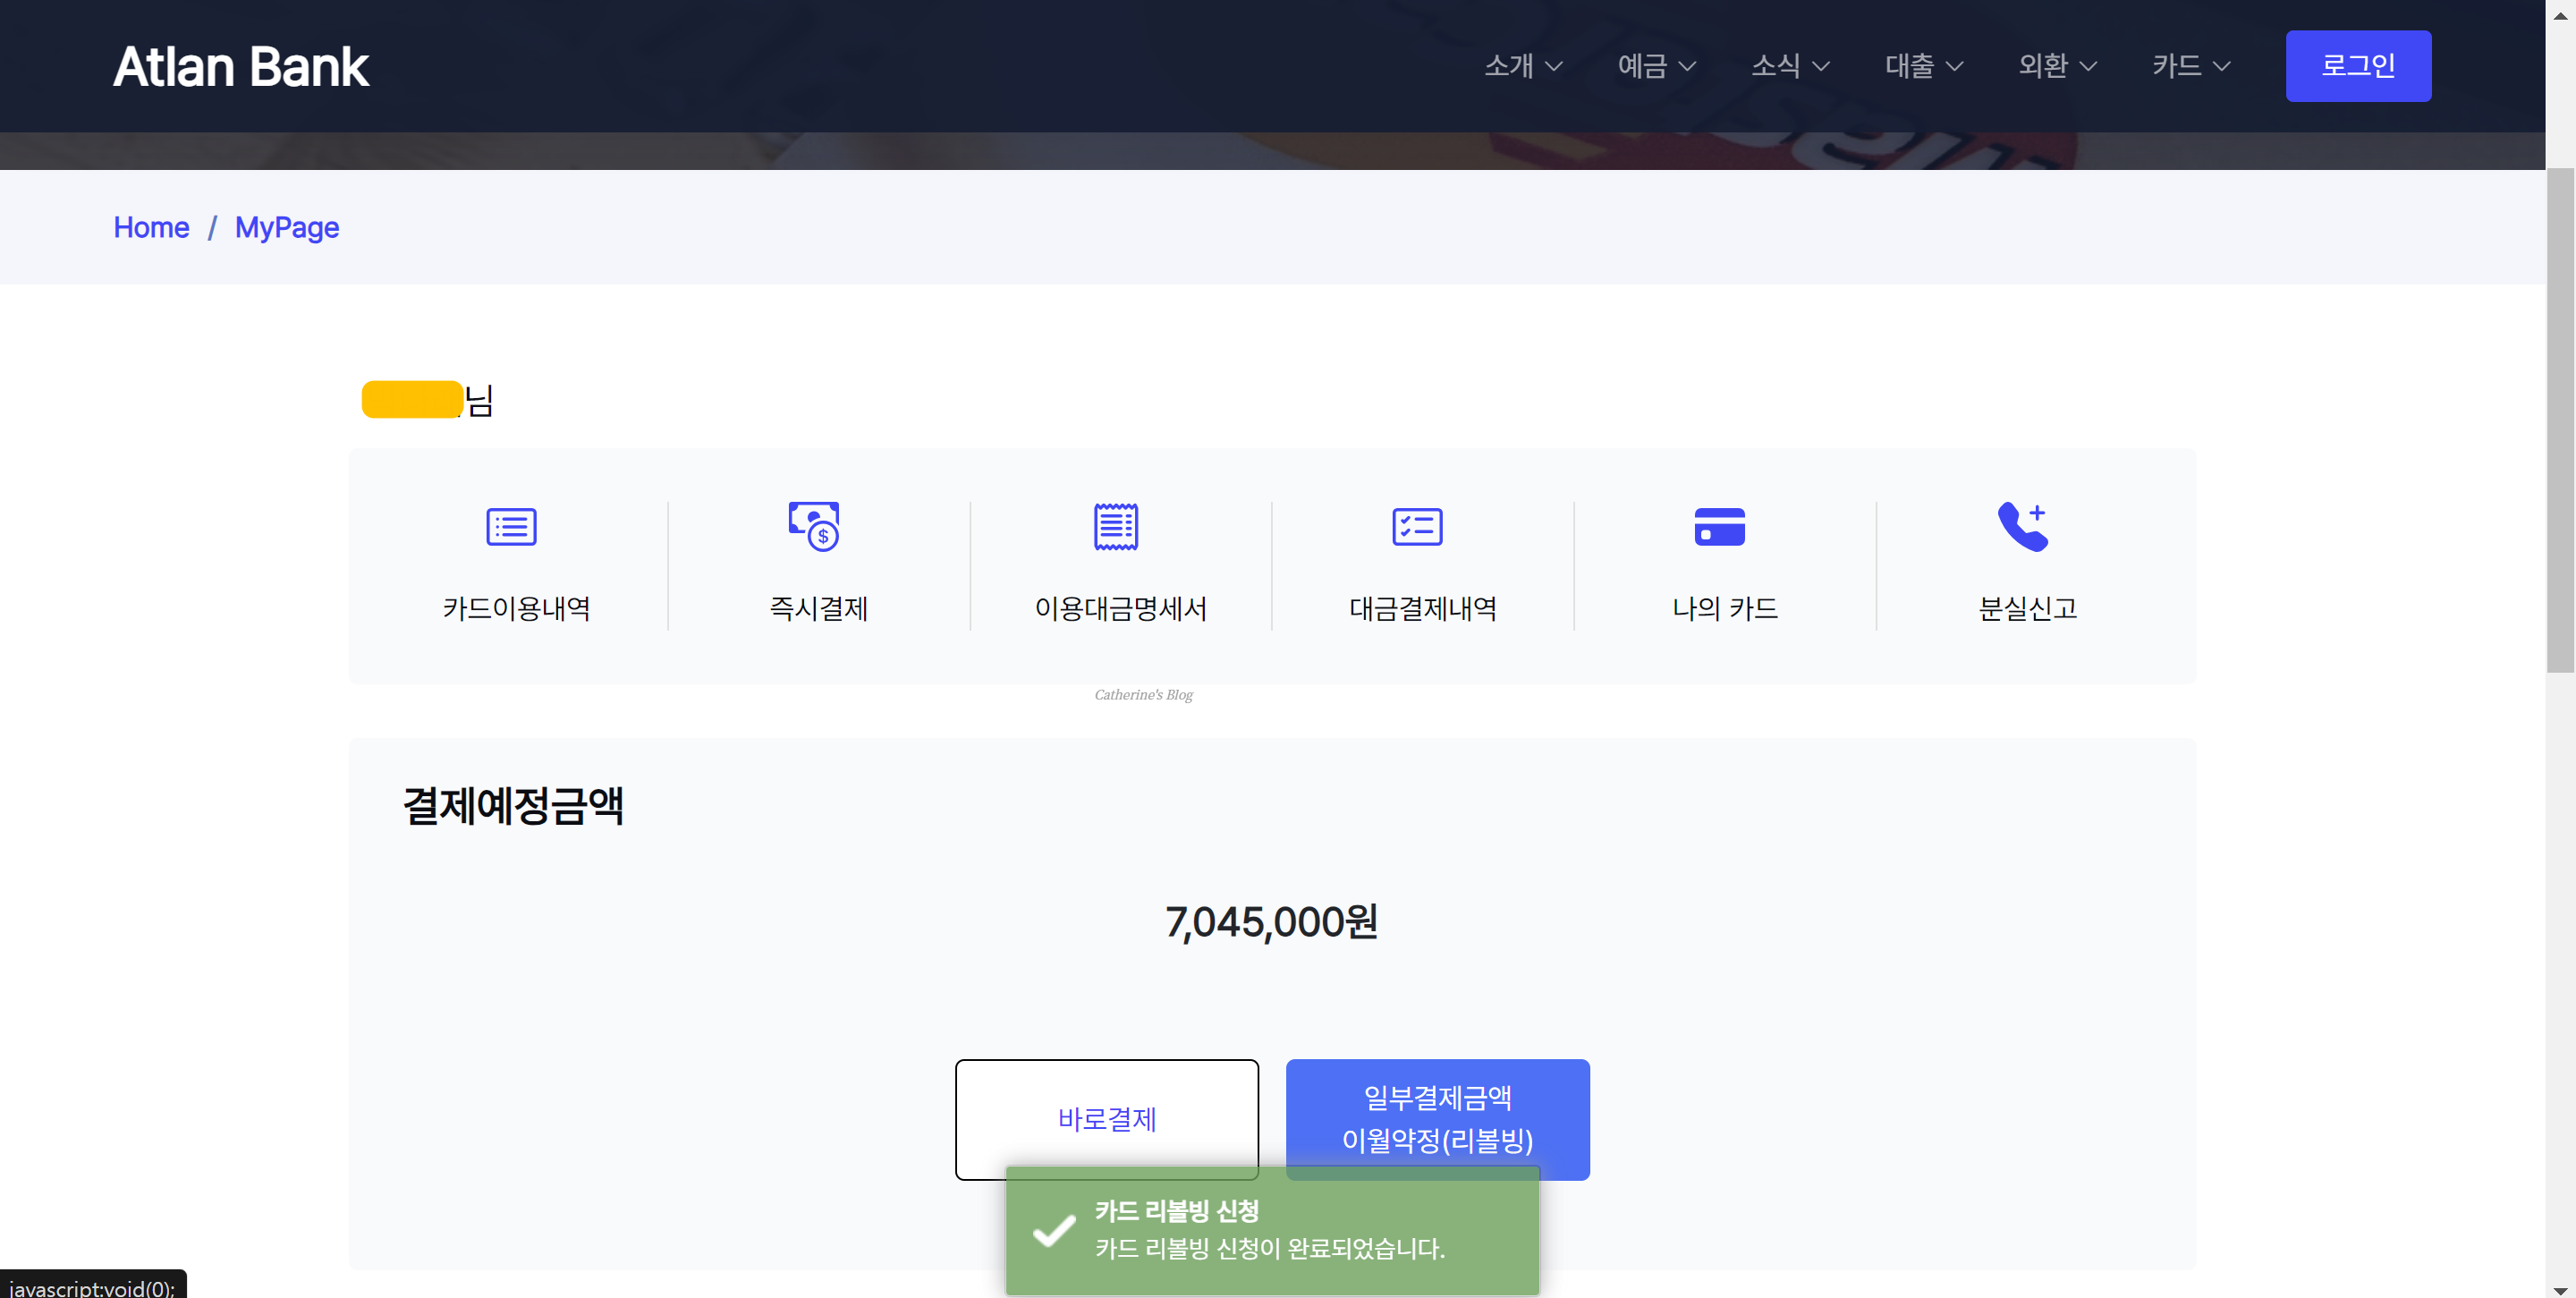
아래 예시사진들에서도 특정 알람을 띄울 때 모두 toastr를 사용했더니 alert();창보다 훨씬 이뻐졌어요!
첫번째 사진인 기존의 alert창과 비교해보면...ㅎ
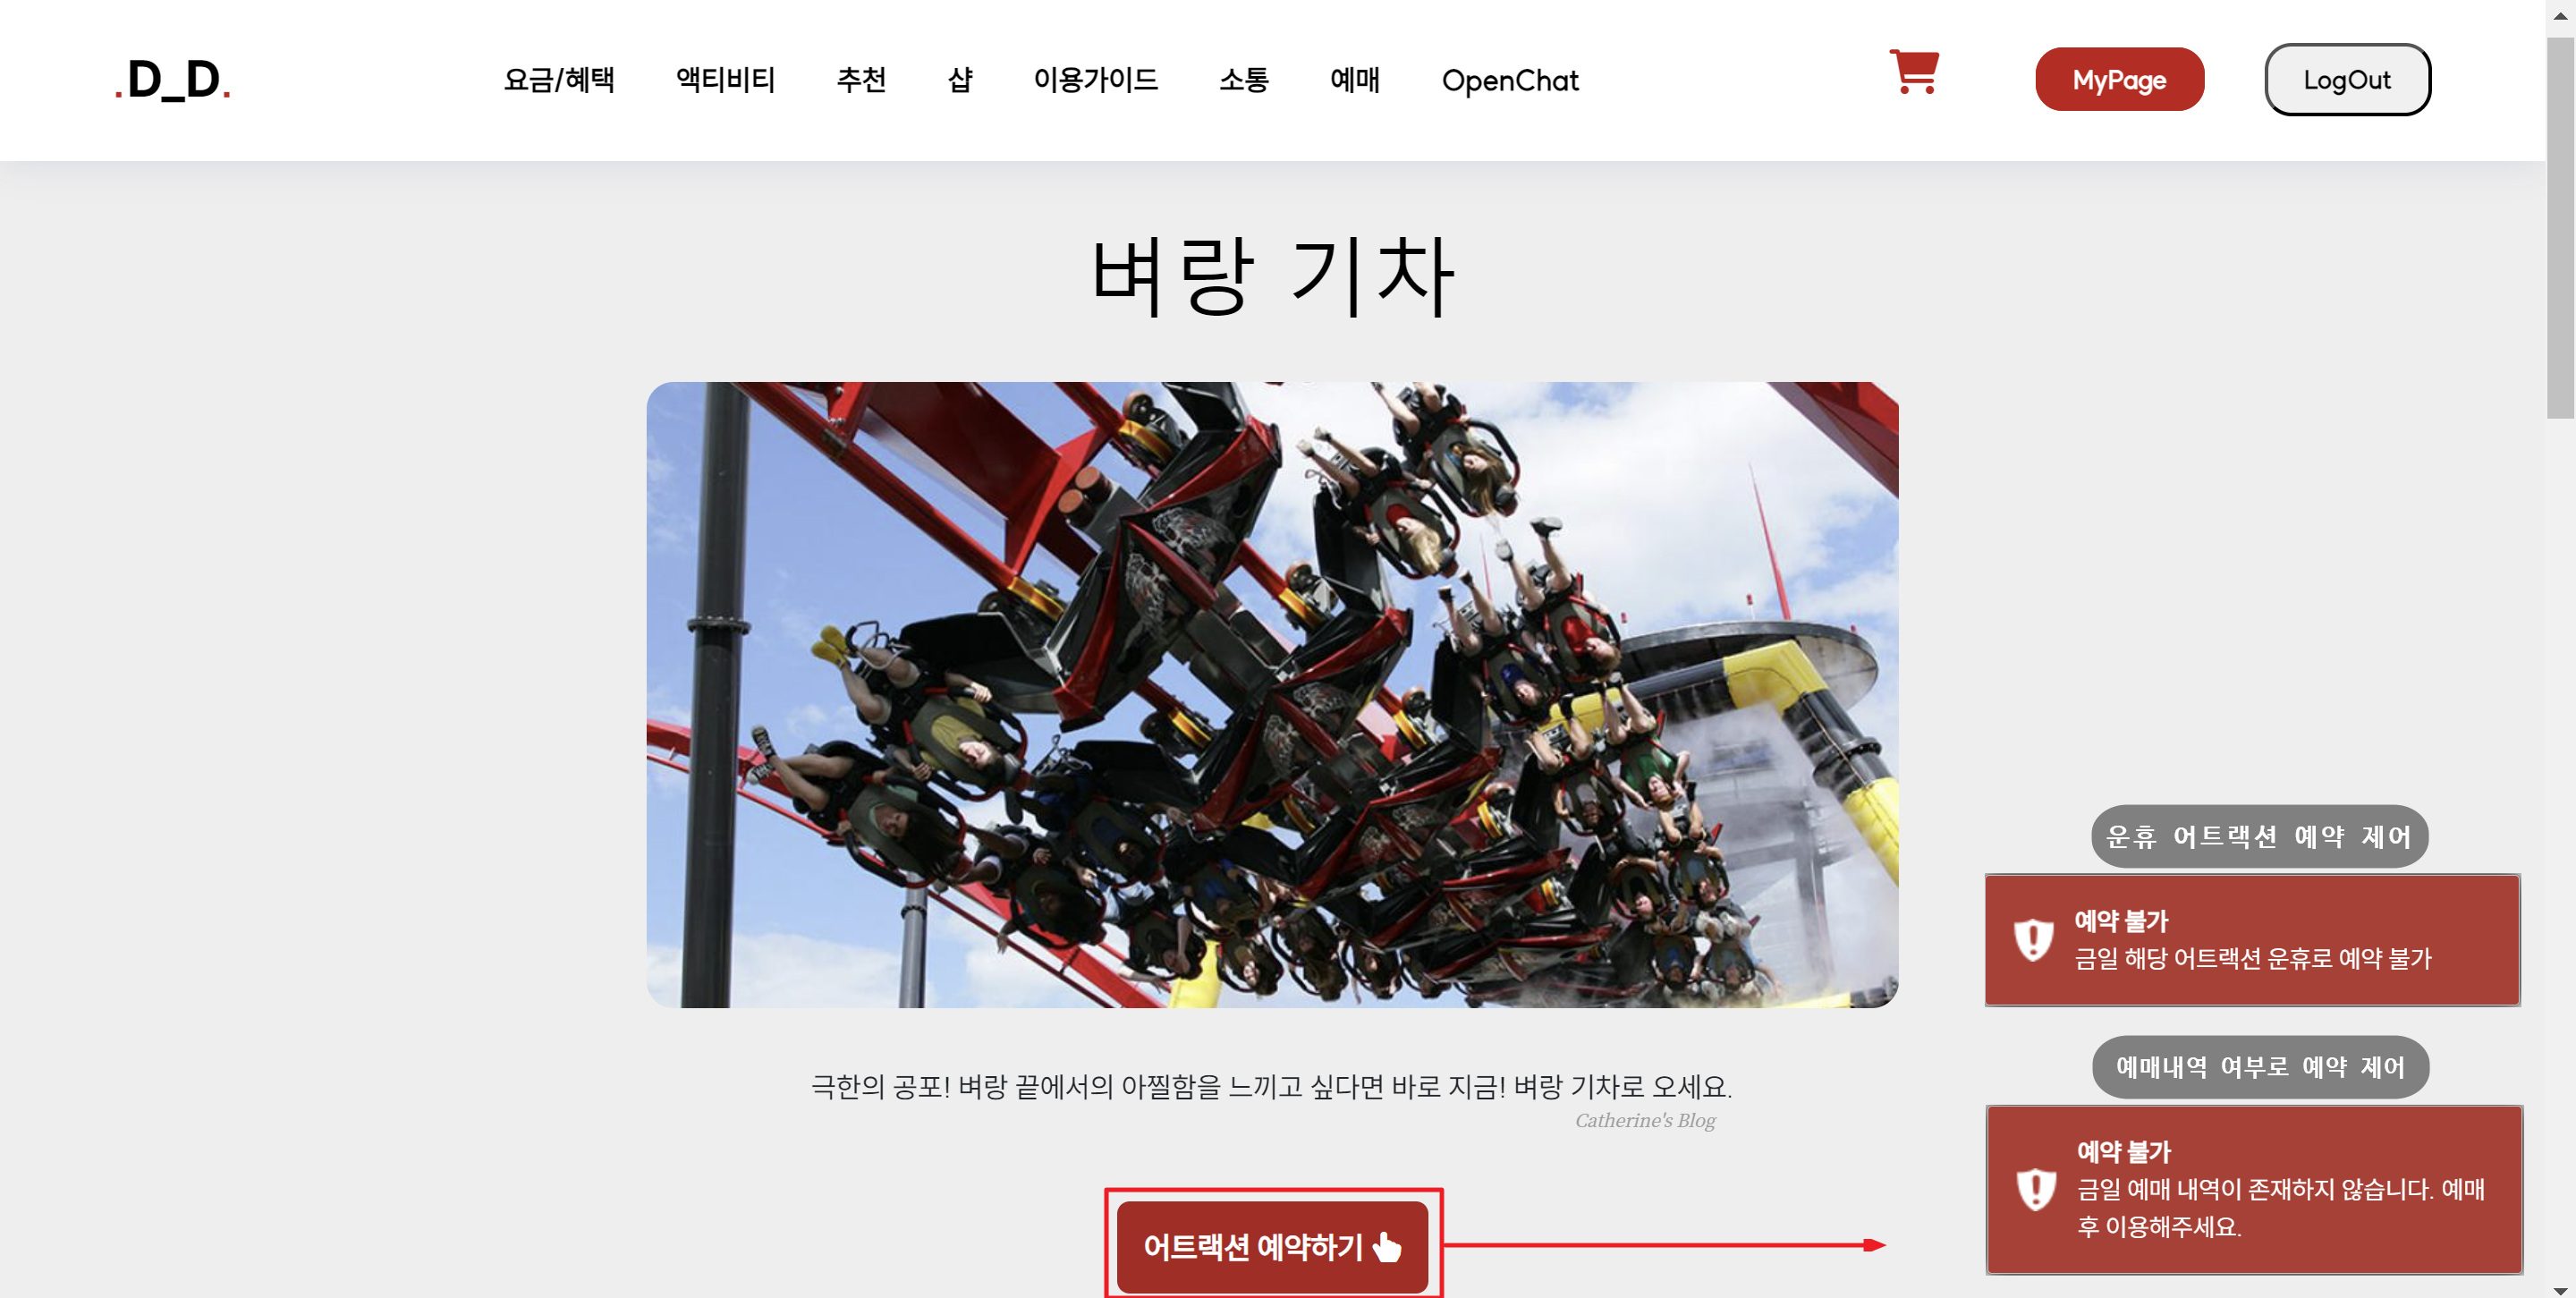
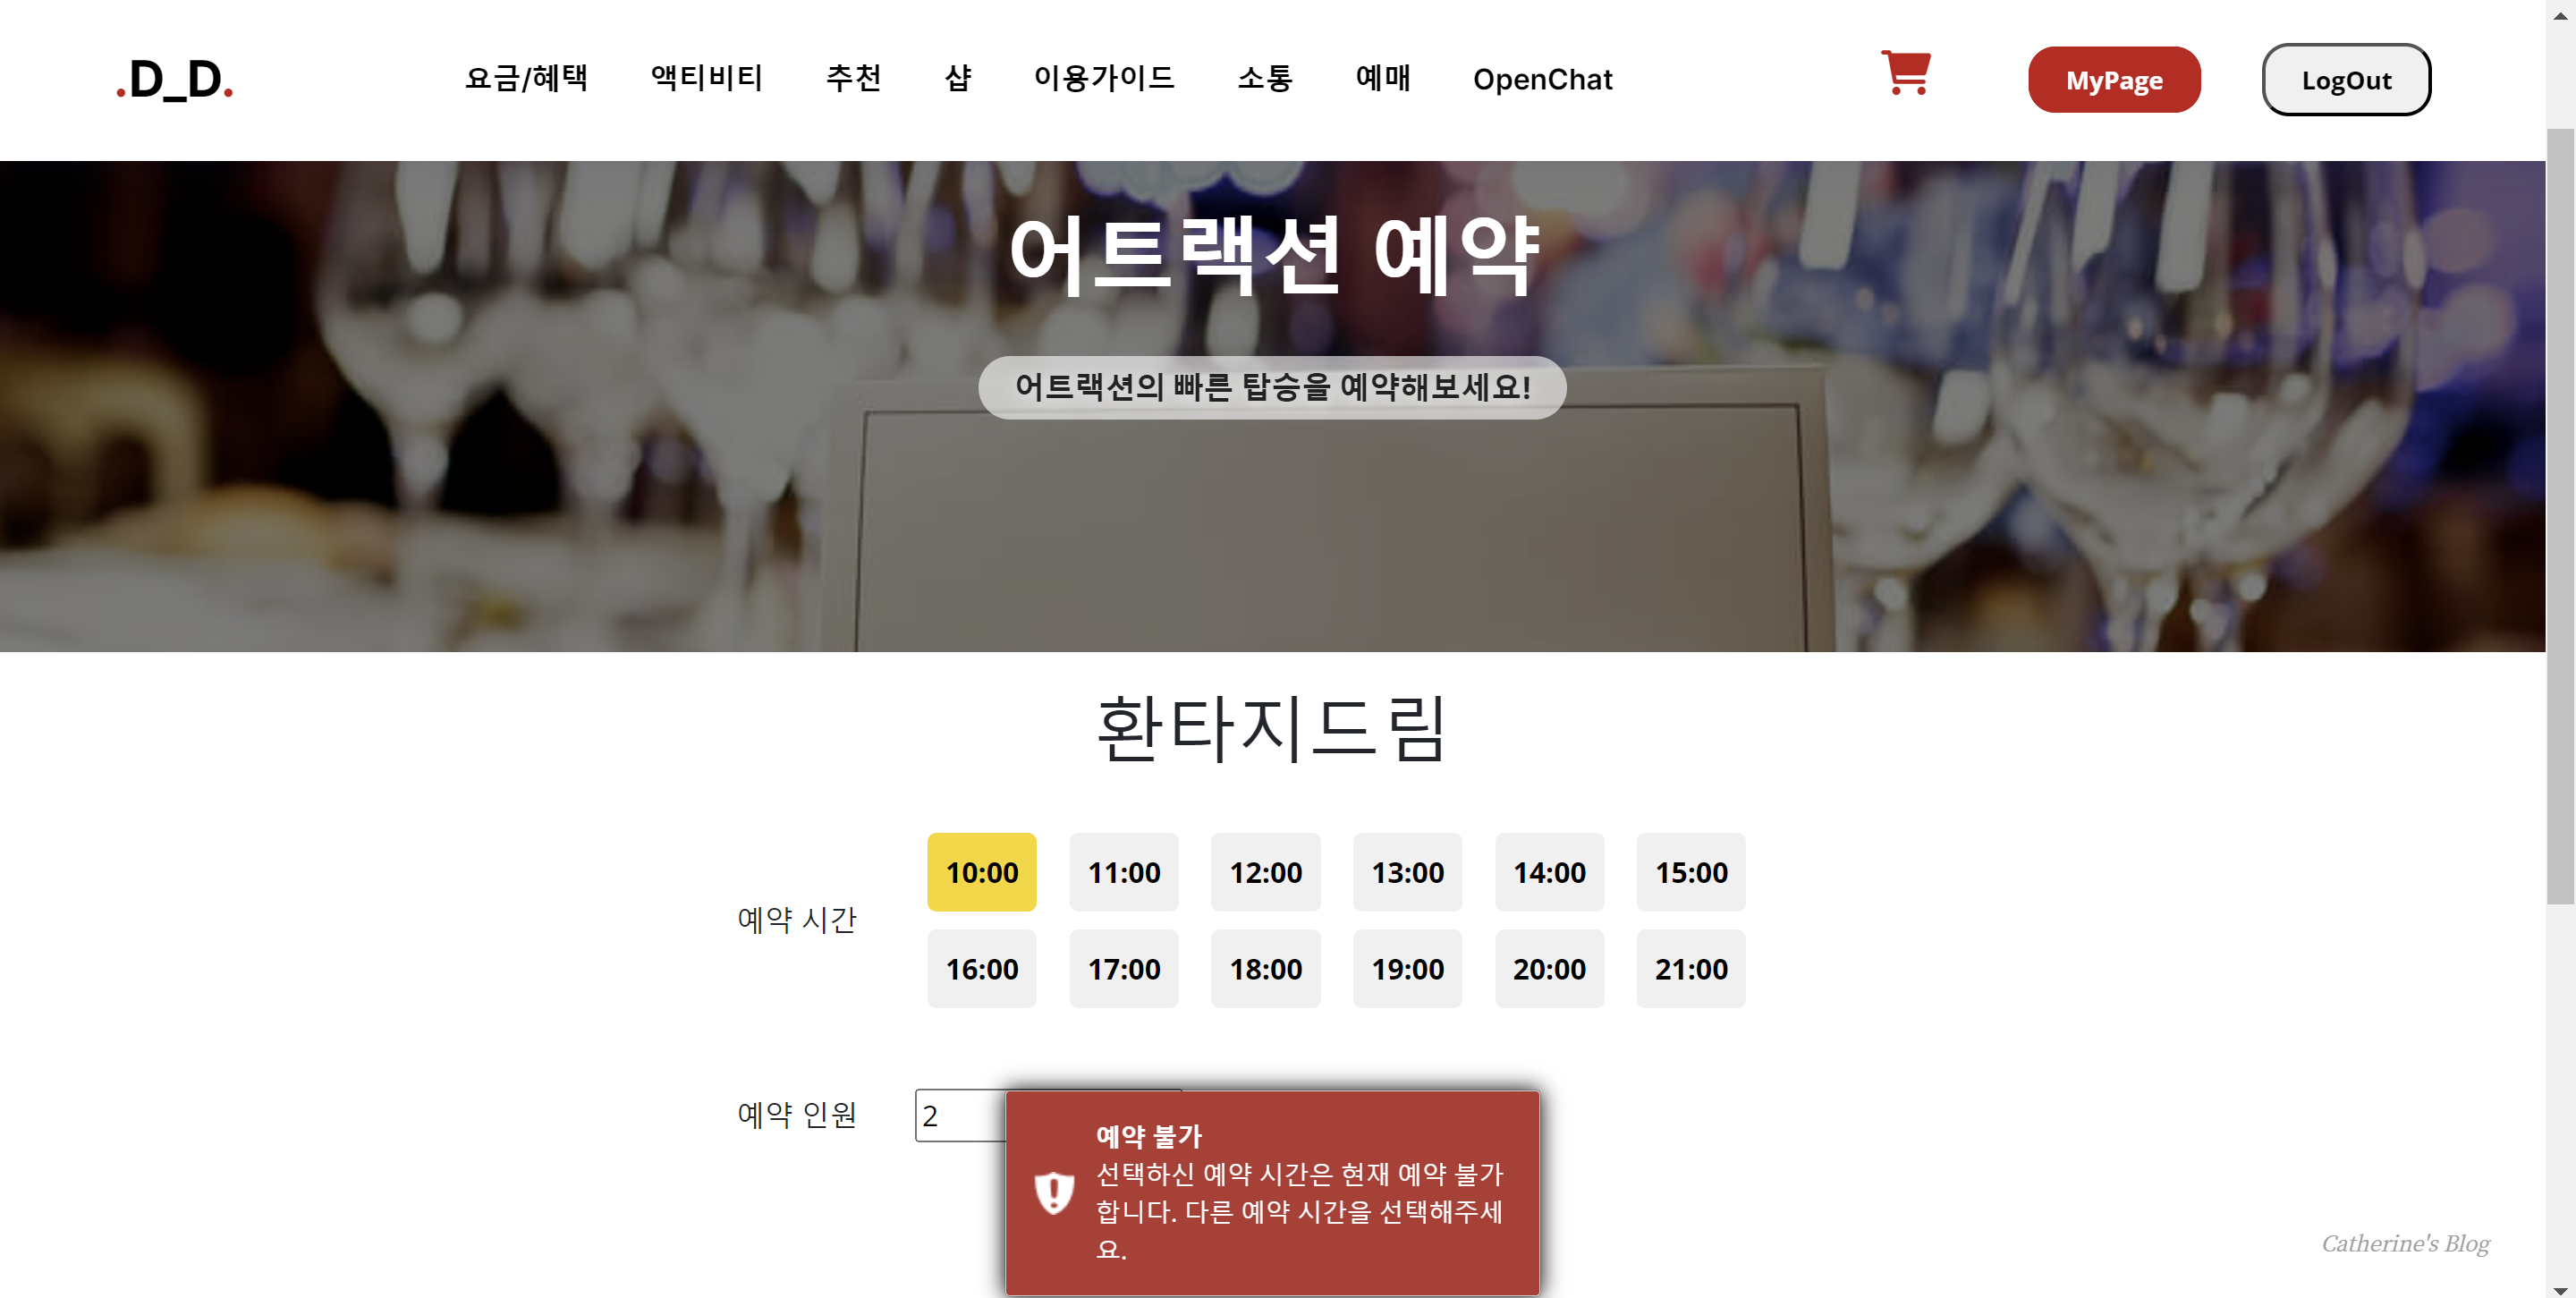
아래가 바로 toastr의 Github 링크입니다.
https://github.com/CodeSeven/toastr
GitHub - CodeSeven/toastr: Simple javascript toast notifications
Simple javascript toast notifications. Contribute to CodeSeven/toastr development by creating an account on GitHub.
github.com
toastr is a Javascript library for non-blocking notifications. jQuery is required. The goal is to create a simple core library that can be customized and extended.
깃헙에도 설명되어있듯이 toastr는 non-blocking 알람을 위한 자바스크립트 라이브러리입니다.
jQuery를 필요로하기 때문에 toastr를 사용하려면 제이쿼리도 같이 가져오셔야합니다.
맛보기로 어떤 느낌인지 보고싶으신 분들은 toastr에서 데모를 제공하니 아래 페이지에서 어떤 느낌인지 확인해보시면 될 것 같아요!
https://codeseven.github.io/toastr/demo.html
toastr examples
codeseven.github.io
toastr 사용 방법
공식 깃헙에 아주 쉽게 toastr를 사용하기 위한 3 Easy Steps가 명시되어있습니다.
저는 CDN으로 toastr를 사용해보겠습니다.
1. <head> 태그 안에 아래 toastr.css 링크를 추가합니다.
<link rel="stylesheet" href="//cdnjs.cloudflare.com/ajax/libs/toastr.js/latest/toastr.min.css">
2. <body> 태그 하단에 toastr.js 링크를 추가합니다.
※ 주의사항: toastr.js에서 jQuery를 필요로하니까 반드시 jQuery를 먼저 로드해줘야합니다!
<script src="//cdnjs.cloudflare.com/ajax/libs/toastr.js/latest/toastr.min.js"></script>
3. 자바스크립트에서 사용은 아래와 같이!
toastr.success('내용입니다', '제목');
이렇게만 하셔도 기본 설정값이 있어서 아래와 같이 알람메세지가 표시됩니다.
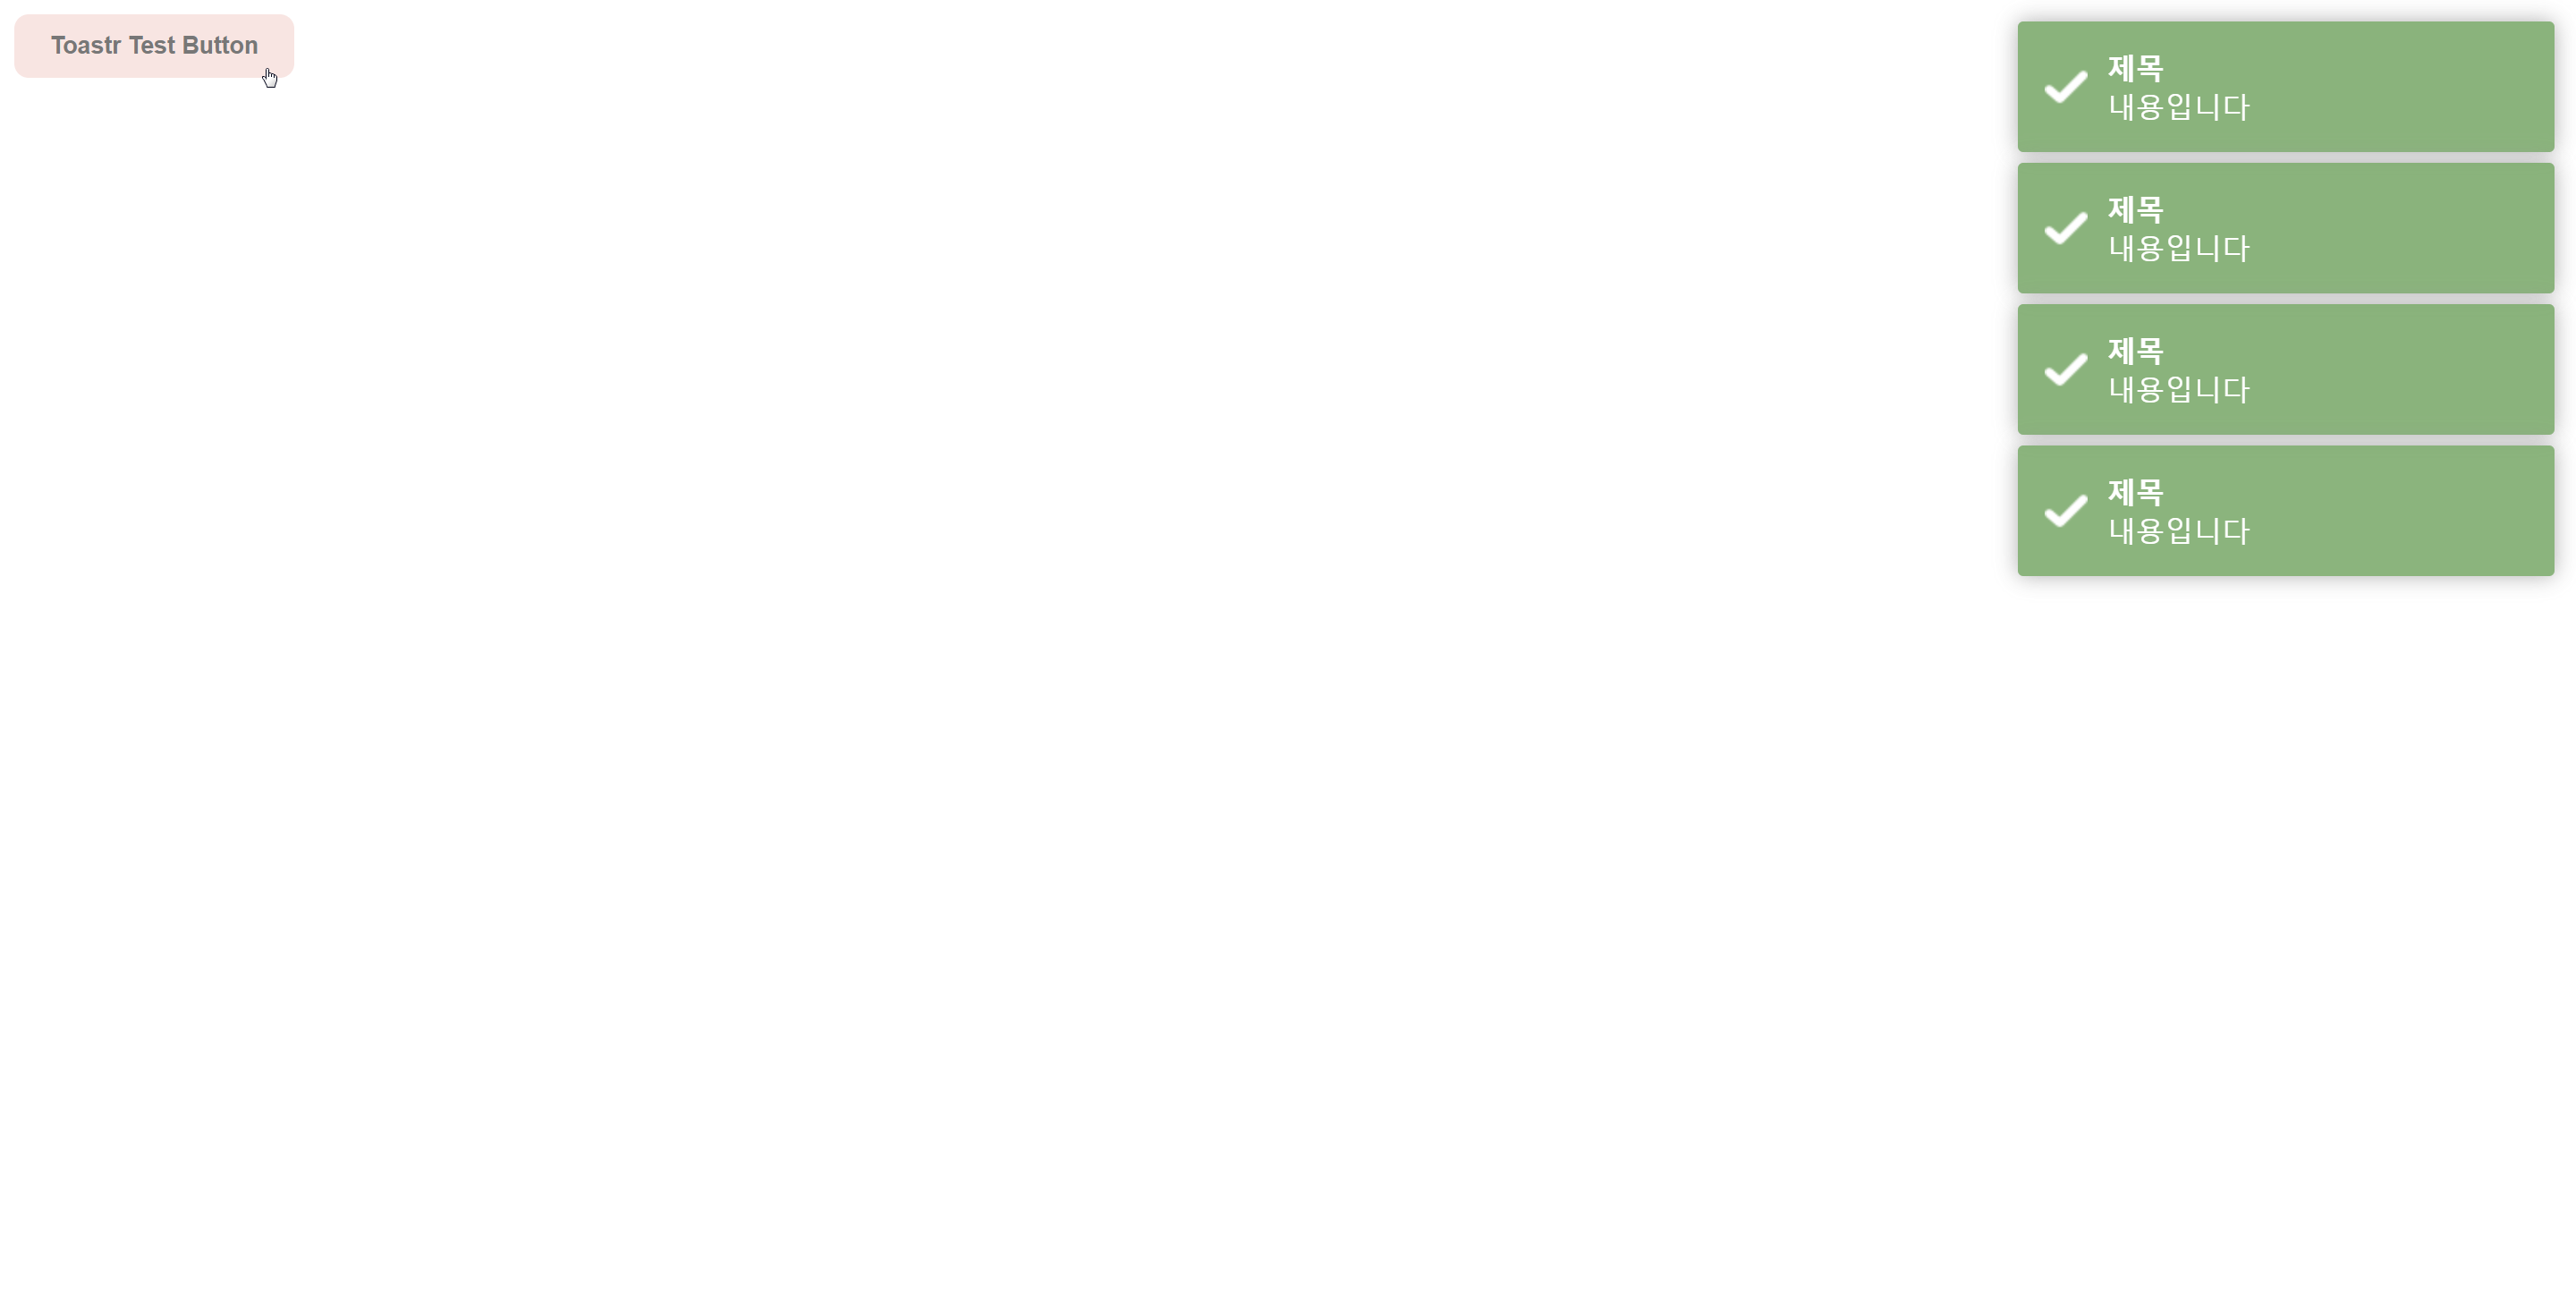
하지만 알람메세지 커스텀하려면 여러가지 속성을 건드려야하는데요,
위에서 말씀드린 데모페이지에서 아주 손쉽게 설정을 할 수가 있답니다. 데모페이지에서 설정한 대로 자바스크립트 코드가 나와서 복사붙여넣기만 하면 되기 때문이죠!
제가 방금 위에서 만든 toastr 사용 예시 코드는 아래와 같습니다.
<!DOCTYPE html>
<html lang="en">
<head>
    <meta charset="UTF-8">
    <meta name="viewport" content="width=device-width, initial-scale=1.0">
    <title>Toastr 테스트</title>

    <!-- toastr -->
    <link rel="stylesheet" href="//cdnjs.cloudflare.com/ajax/libs/toastr.js/latest/toastr.min.css">

    <style>
        button {
            padding: 10px 20px;
            background: mistyrose;
            color: #777;
            border-radius: 8px;
            border: 0;
            cursor: pointer;
            font-weight: bold;
        }
    </style>

</head>
<body>

    <button type="button" onclick="test()">Toastr Test Button</button>

    <!-- jQuery -->
    <script src="https://code.jquery.com/jquery-3.7.1.js"></script>

    <!-- toastr -->
    <script src="//cdnjs.cloudflare.com/ajax/libs/toastr.js/latest/toastr.min.js"></script>

    <script>
        function test() {
            toastr.success('내용입니다', '제목');
        }

        //toastr 커스텀시 설정(데모페이지에서 가져올 수 있음)
        toastr.options = {
			"closeButton": false,
			"debug": false,
			"newestOnTop": false,
			"progressBar": false,
			"positionClass": "toast-top-center",
			"preventDuplicates": false,
			"onclick": null,
			"showDuration": "300",
			"hideDuration": "1000",
			"timeOut": "5000",
			"extendedTimeOut": "1000",
			"showEasing": "swing",
			"hideEasing": "linear",
			"showMethod": "fadeIn",
			"hideMethod": "fadeOut"
		};
    </script>
</body>
</html>
Toast Type 종류
Toast Type의 종류에는 총 4가지가 있습니다.
- Success
- Info
- Warning
- Error
종류에 따라 메세지의 배경 색상과 아이콘이 다르니 원하는 형태에 맞춰서 사용하시면 될 것 같아요.
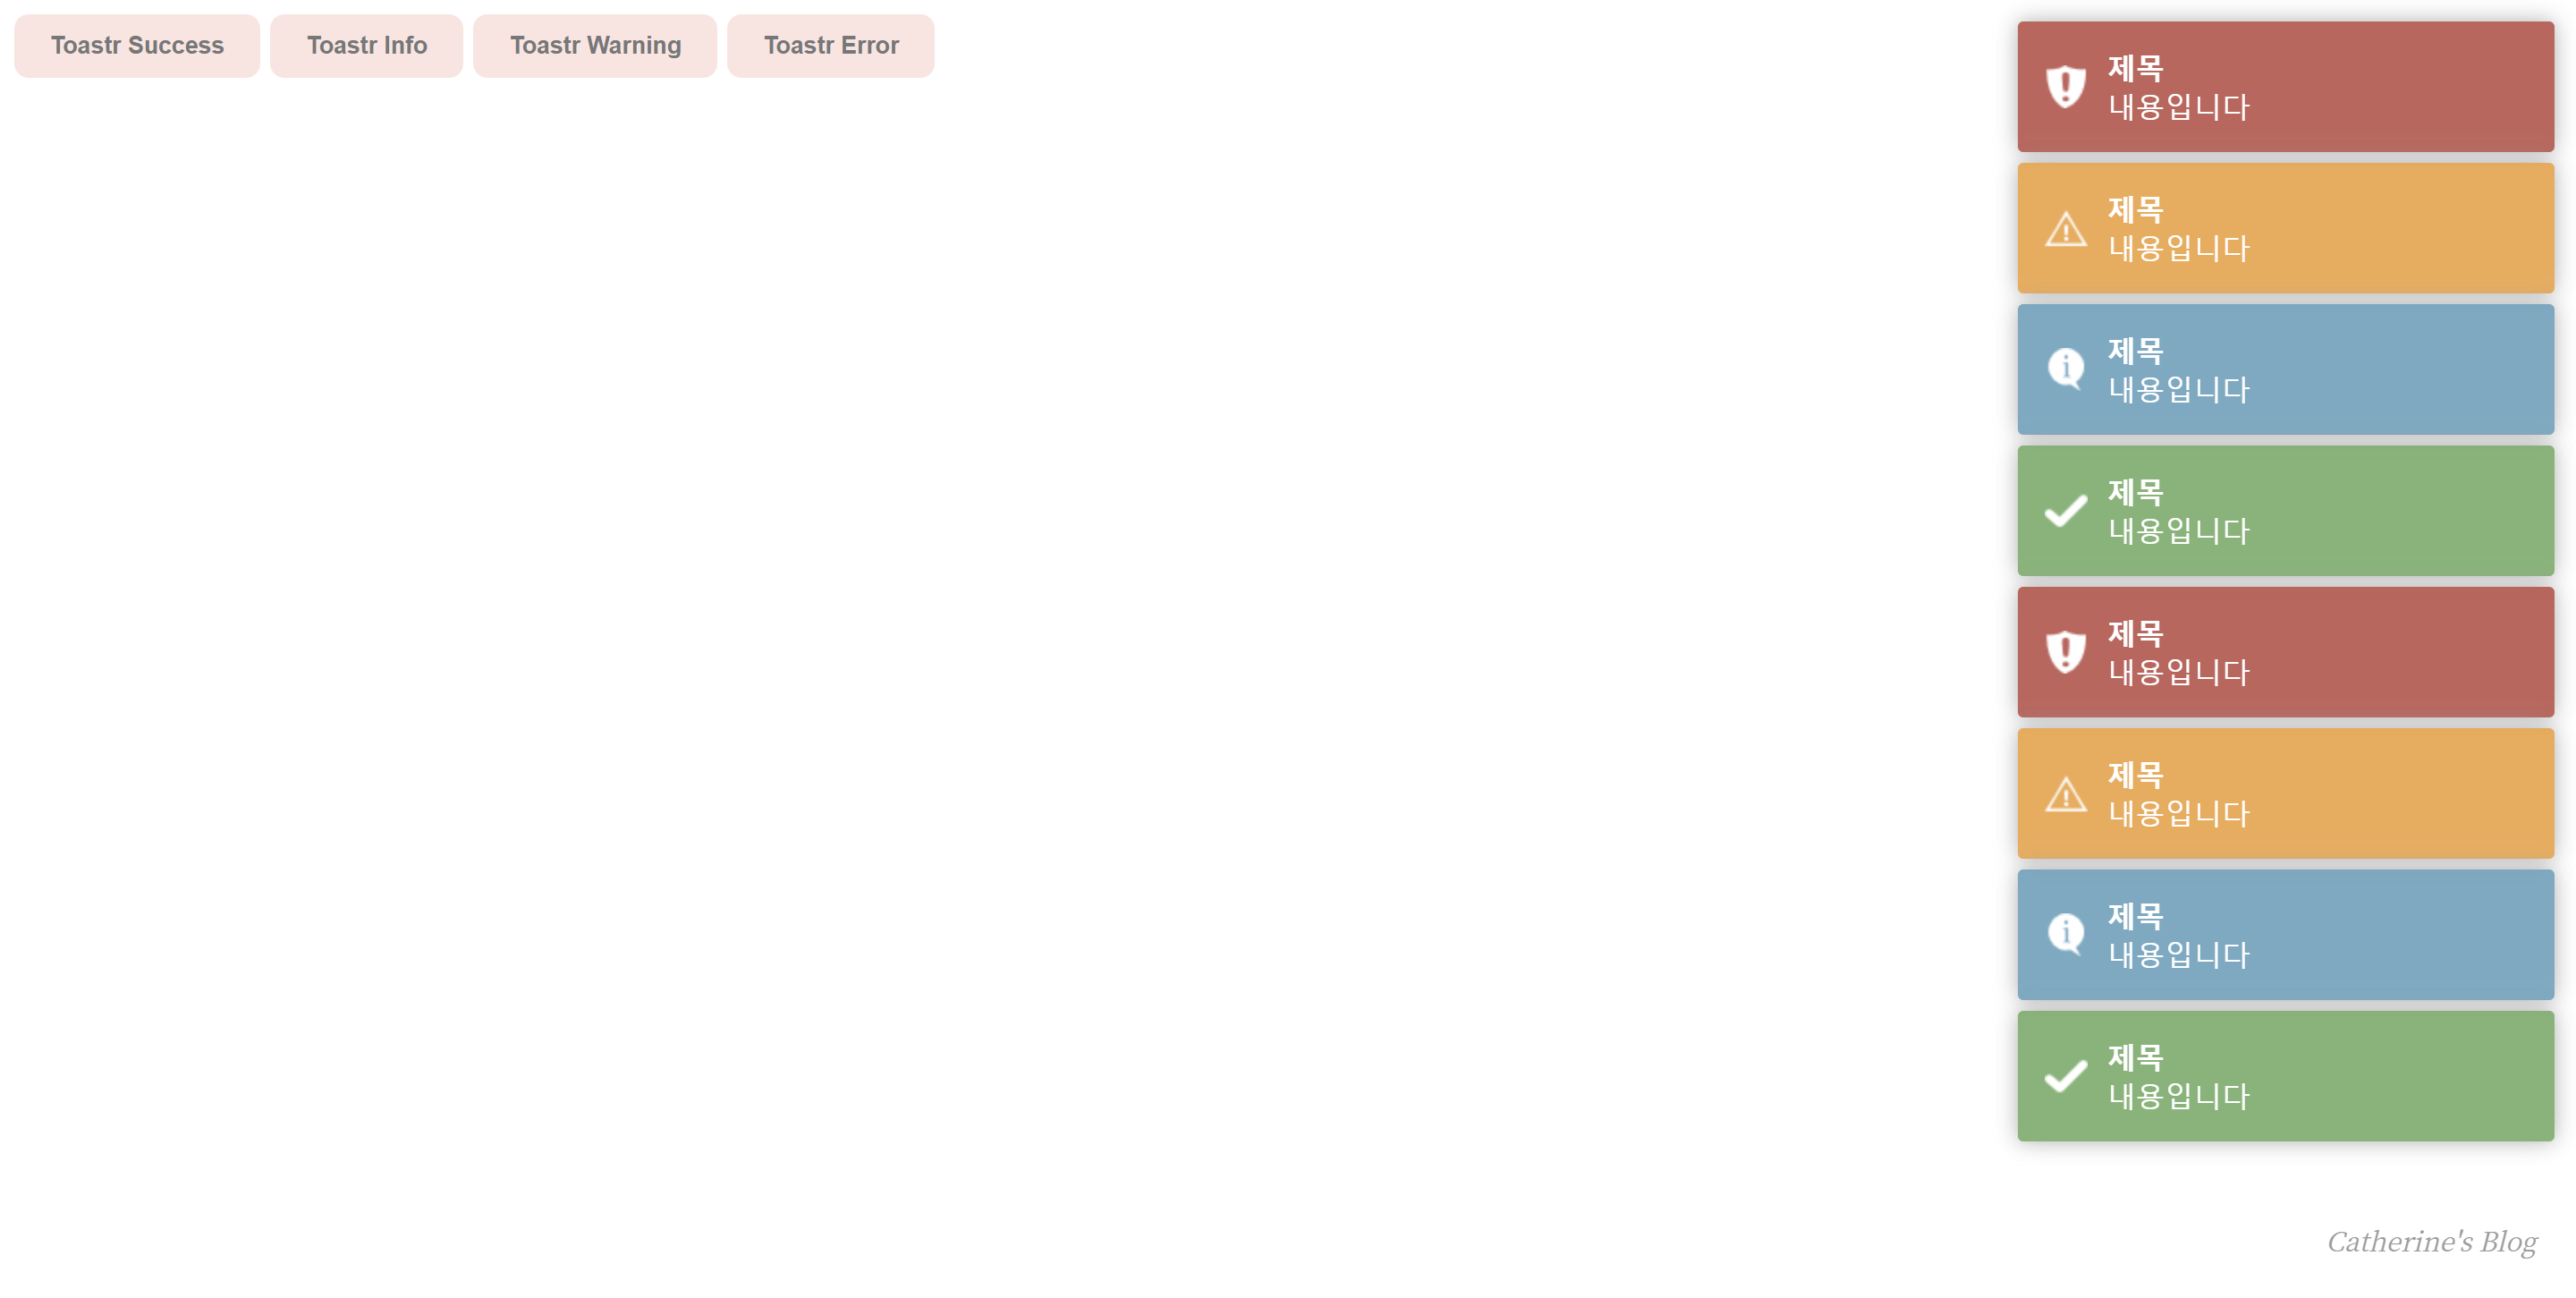
종류는 아래와 같이 toastr.type 이렇게 작성하시면 됩니다.
<!DOCTYPE html>
<html lang="en">
<head>
    <meta charset="UTF-8">
    <meta name="viewport" content="width=device-width, initial-scale=1.0">
    <title>Toastr 테스트</title>

    <!-- toastr -->
    <link rel="stylesheet" href="//cdnjs.cloudflare.com/ajax/libs/toastr.js/latest/toastr.min.css">

    <style>
        button {
            padding: 10px 20px;
            background: mistyrose;
            color: #777;
            border-radius: 8px;
            border: 0;
            cursor: pointer;
            font-weight: bold;
        }
    </style>

</head>
<body>

    <button type="button" onclick="success()">Toastr Success</button>
    <button type="button" onclick="info()">Toastr Info</button>
    <button type="button" onclick="warning()">Toastr Warning</button>
    <button type="button" onclick="error()">Toastr Error</button>

    <!-- jQuery -->
    <script src="https://code.jquery.com/jquery-3.7.1.js"></script>

    <!-- toastr -->
    <script src="//cdnjs.cloudflare.com/ajax/libs/toastr.js/latest/toastr.min.js"></script>

    <script>
        function success() {
            toastr.success('내용입니다', '제목');
        }

        function info() {
            toastr.info('내용입니다', '제목');
        }

        function warning() {
            toastr.warning('내용입니다', '제목');
        }

        function error() {
            toastr.error('내용입니다', '제목');
        }
    </script>
</body>
</html>
사용하기도 무지 편한 toastr!
하지만 확실히 주목도가 alert()창에 비해서 떨어지는건 사실입니다. 웹 화면은 무지 크잖아요? 근데 화면 좌측/중앙/우측 상·하단에 알람 메세지가 뜨다보니 대충보면 안보일법도 하죠.
But 예뻐요.
여러가지 속성들이 있지만 제공하는 데모페이지에서 무지무지무지 손쉽게 속성을 확인할 수 있어서 따로 정리하진 않았구요
제가 멀지않은 미래에 사용하려고하면 또 까먹을까봐 정리해놓습니당.
내용에 오류가 있으면 말해주세요:)
그럼 이만!
*글 작성에 참고한 포스트: https://shanepark.tistory.com/132 (처음에 이분의 포스트를 통해 toastr의 존재를 알게되었습니다!)
'JavaScript' 카테고리의 다른 글
| [JS] for문에서 객체 배열에 추가하기(초기화, JSON, Spread Syntax 사용) (0) | 2025.01.09 |
|---|---|
| [JavaScript] 함수(Function) (0) | 2023.10.04 |
| [JavaScript] 자료형(Data Type) (0) | 2023.10.04 |
| [JavaScript] JavaScript에 대하여 (0) | 2023.10.04 |
블로그의 정보
All of My Records
캐떠린